FreeFileSync is a Free software for Synchronizing the two folders in a computer or between two computers, this software is very useful Specially if you want to Replicate or mirroring the main Server with Backup Server, you simply Sync the main Folder of one Server with the main folder of Backup Server through FreeFileSync Software and you can easily update any changes in both side. both Servers will updated and replicated with same data. it will helpful when your main Server is go down and than your backup Server will take charge as a main server with updated data records.
Today we will post the Step by step guide of FreeFileSync.
First of all download the FreeFileSync, and install on your computer.
Today we will post the Step by step guide of FreeFileSync.
First of all download the FreeFileSync, and install on your computer.
Complete your installation, after completion a icon is pasted on your desktop.
Installation will take not much time and after the installation of the application, the interface of the application is as shown the figure 2 below:
Now we will introduce different option of the software interface as you see in the figure 2.
1 Browse button shown, in which you select the Source Folder that you want to syncronize to destination folder.
2 Hare you select the destination folder or second folder.
3 Click the Compare button to show the difference of contents between two folders.
4 Click to Synchronize the two folders.
So for understanding the working of FreeFileSync application, you just fallow the following steps.
First of all you need to create two folders in different location on your hard drive.
First create the folder in C Drive. Named as you like and create a word file also.
Second create a folder in D Drive and create a word file in the folder. As shown the below figure:
Figure of two creating files.
As you see in the figure above the both folders and files have same name. the folder name may be different, but the file name must be same.
Now open the word file that place in the C: drive and write some data on it. As shown the figure below:
As you see in figure above when we write some text on word file and save the file, the size of file is now changed, that is 9.73 KB.
Next open the FreeFileSync application and first click the browse button as shown the figure (shows with 1 number red arrow).
Select the C drive folder that created yet, one thing remember that select the exact folder. And next on right size (shows with 2 number arrow) click the browse button, and select the D drive folder. You can also see the full path of the both folders in the text box before the buttons.
After selecting the folders, now you click the compare button. After clicking the Compare button the interface will like that:
In above figure, on left side arrow there are two files shown. One is your original file that you have created and second is the temp file of original file, because the file is open. And its size is 9.90KB shown.
Whereas on the other side only one file is shown, that is the original file that you have created and its size is 0 bytes, because its contain nothing.
Now click the Synchronize button to the top right corner of the application. And application will synchronize the data of both file and shown the result, as shown the below figure:
Completed message is shown and you can also see the log detail by click the log tab, shown in the above figure.
Now let first examine the files, we make changing in the word file that located in the C: drive, and now we look the file that located in the D: drive. Shown both file in below figure:
Yes I do it, you see the file located in the D: drive, the data have synchronized.
Now the main point of this application is that whenever you change the content of one file and synchronize through FreeFileSync the data on second file will auto write.
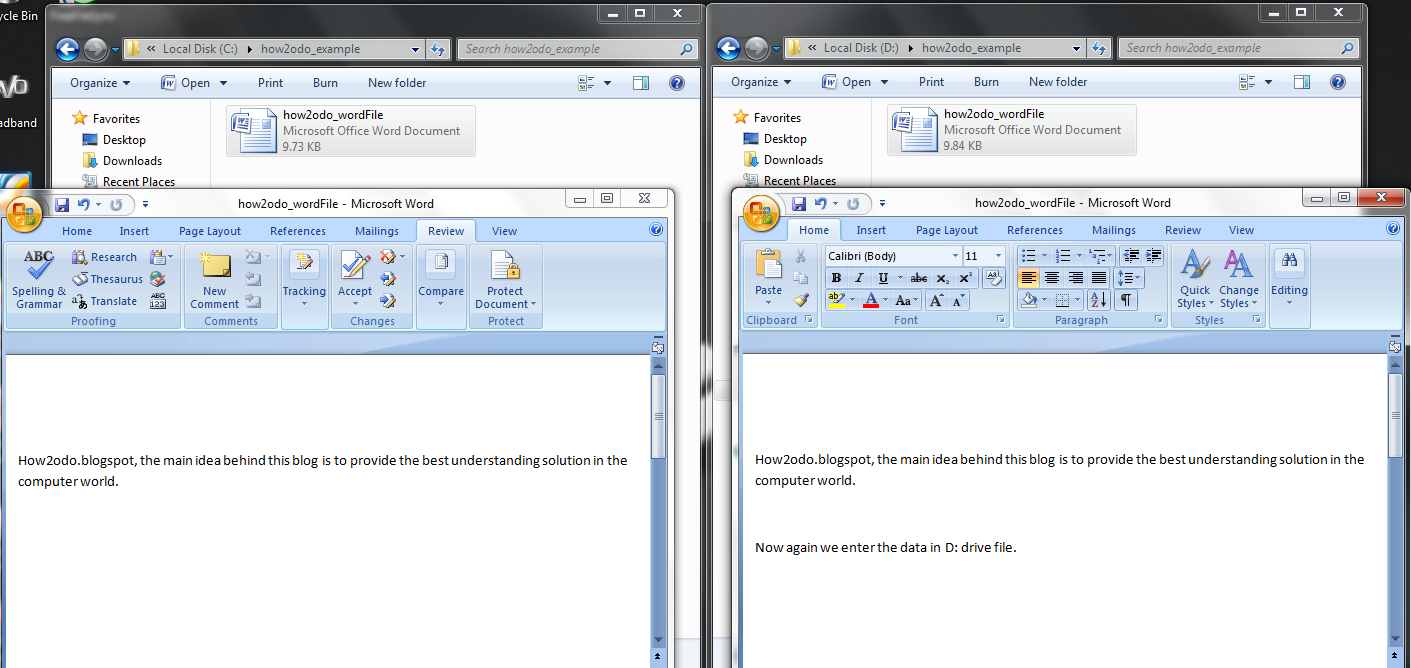
Now you write some text on the file that located in the D: drive and save the file, as shown in the figure below:
After that close the word file that located in the C: drive and click the Compare button on the application and then click the Synchronize button. A completed message is shown and now you check again the C: drive file that will be updated.
This is the basic steps and use of the FreeFileSycn,
Comment must about this article,
Regards.


No comments:
Post a Comment